
App Manual
Index
Quick Setup
Read our getting started guide for setting up a new KiddieAlarm device in no time! Also take a look at our device manual on how to install and proper use a KiddieAlarm.
Create your KiddieAlarm Account
In order to use KiddieAlarm you need an account with us. We provide you with two options to login/create an account:
- The fast way: with a single button press you can login with your Google or Facebook account. No extra KiddieAlarm password to remember. It’s super fast and mega secure since we rely on the security mechanisms of Google and Facebook. And best of all: we will never access your Google or Facebook data nor post anything to it!
- A manual KiddieAlarm account: the downside is that you will have to remember another password and provide us with some basic data (we don’t ask much). But on the positive side you are not sharing your social Google or Facebook account with us if you don’t like. It’s always possible to link your social account to your custom KiddieAlarm in the future!
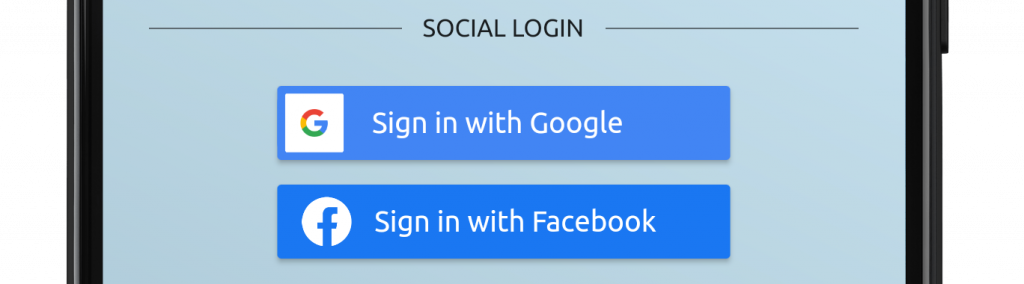
Login with Facebook or Google
In order to login with your Google or Facebook account, all you need to do is to click the button. Depending on Google or Facebook they will ask you to login or take you to one of their apps first for a secure authentication and before you know you are logged in to KiddieAlarm!
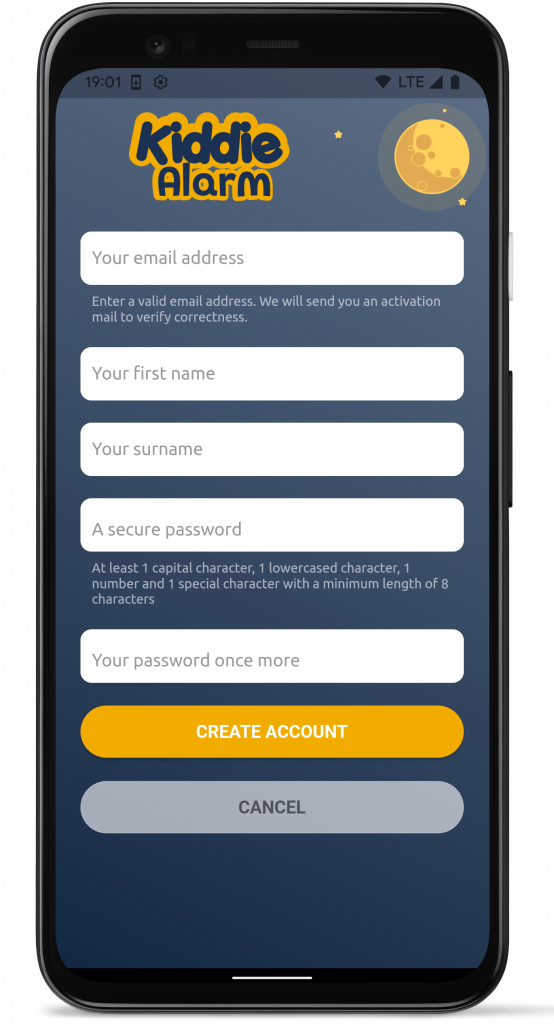
Create a user-account
Before registering your KiddieAlarm you need to make sure you have a KiddieAlarm account. If you don’t you can easily create one from the login.

In just a few simple steps your account is created:
- Provide us with some basic account information (email, name and your password)
- Wait for the activation email to be in your inbox (should be there in a few minutes)
- Click the activation link from your activation email
- You can now login from the KiddieAlarm app
Delete your account
From your user profile you can delete your account. This will log you out of the application and delete all your user information from your account (such as your registered data or linked social profile).
Installing your new device
To get your new device fully setup we advice you to follow the getting started manual. It will get your KiddieAlarm installed in just a few minutes! You can come back here afterwards to check in more details the further working of the app and KiddieAlarm.
List of KiddieAlarms
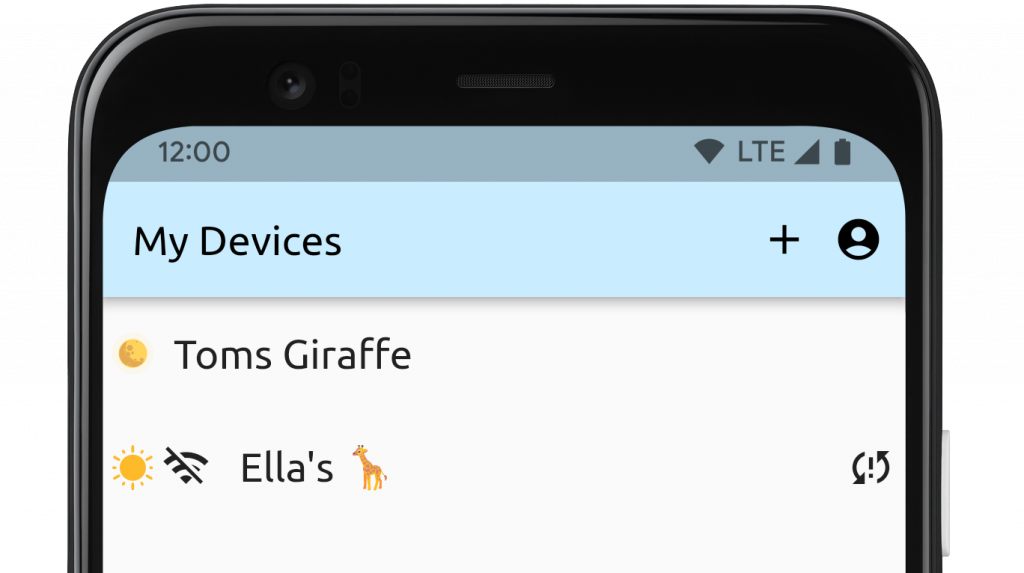
On the list of your KiddieAlarm devices you can easily see the status, add a new device or by tapping one of the devices you can go to its details.
Device Statuses symbols
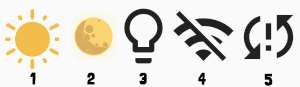
- KiddieAlarm is in status awake
- KiddieAlarm is in status sleeping
- Light of the KiddieAlarm has been turned off, either manual or automated to save on power
- KiddieAlarm has trouble getting online, it’s currently unable to connect to the WiFi network
- You have made changes to your KiddieAlarm settings which are not yet picked up by your KiddieAlarm
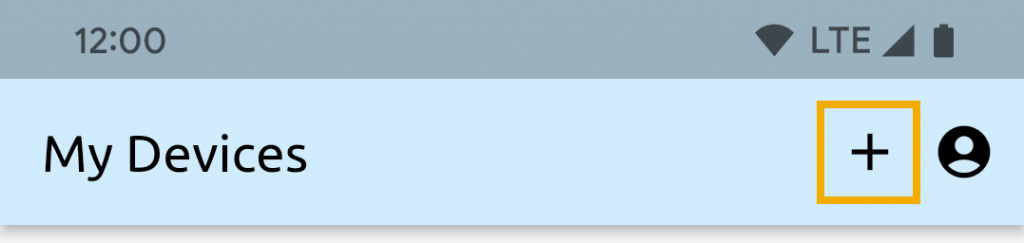
Menu options
- Start the new device configuration
- Open your personal profile
Configuring your KiddieAlarm
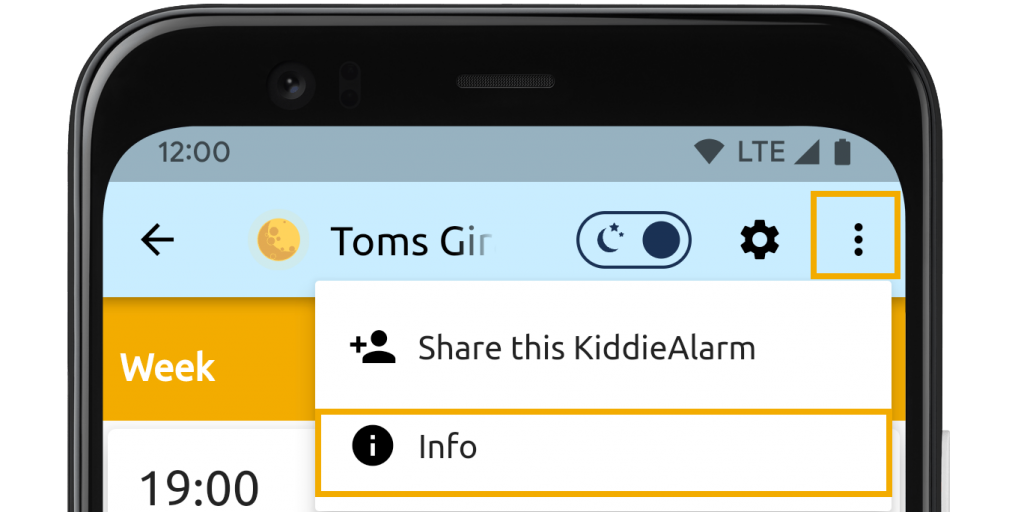
Menu options
- Toggle day and night mode
- Edit your device settings
- Show the more options menu for options 4 and 5
- Share your KiddieAlarm with someone else
- Show more technical information about your KiddieAlarm
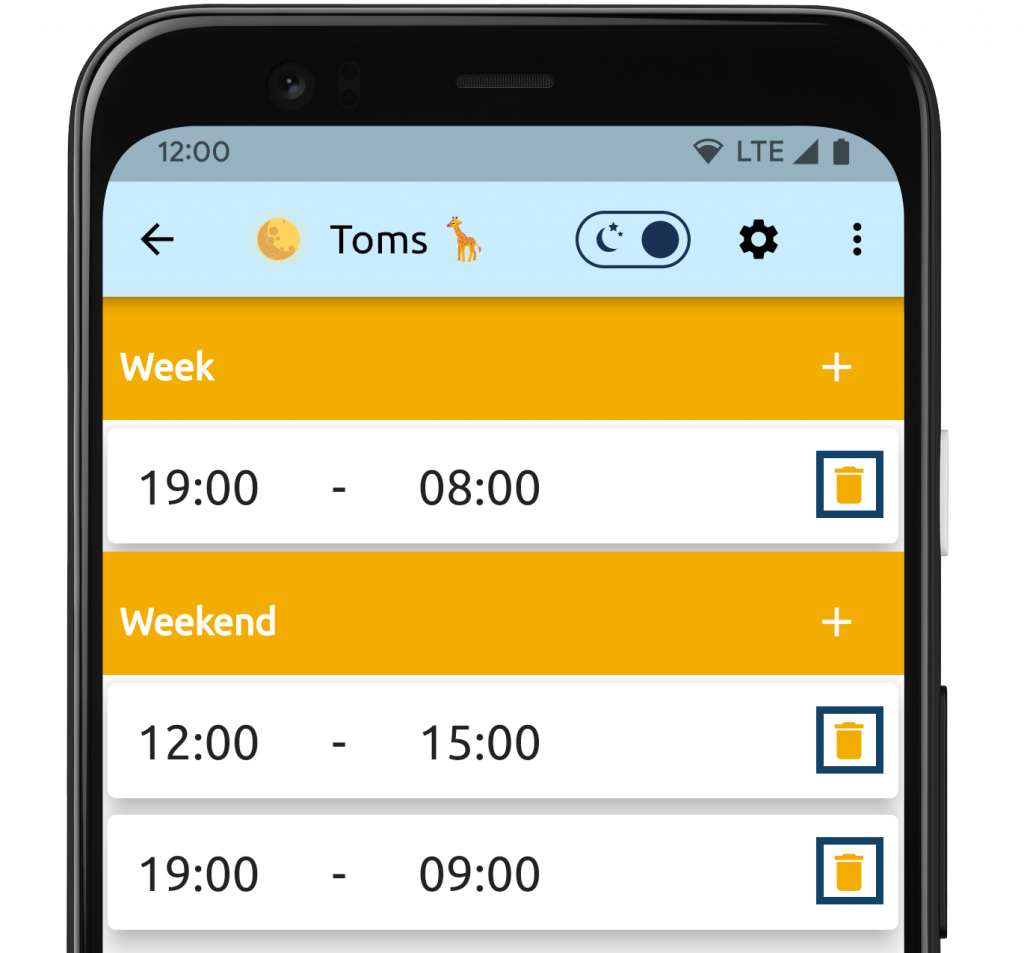
Configuring sleep times
KiddieAlarm’s entire idea is built around sleep time. A sleep time consists of two things:
- The time your kid needs to go to bed (evening or noon-nap time)
- The time your kid can get out of bed again (morning or end of noon-nap time)
Depending on your configuration you can define sleep times day by day for every day of the week or (the default) for the week (mon-fri) and weekend (sat-sun). This gives you the flexibility you need and at the same time it does not make the configuration over complicated.


There are just a few rules to keep in mind:
- You can have a maximum of up to 3 sleep times per day, no more. That means usually 2 nap times (for babies and/or toddlers) and 1 night sleep time.
- At least one sleep time is required per day
- Sleep times of a single day cannot overlap with each other
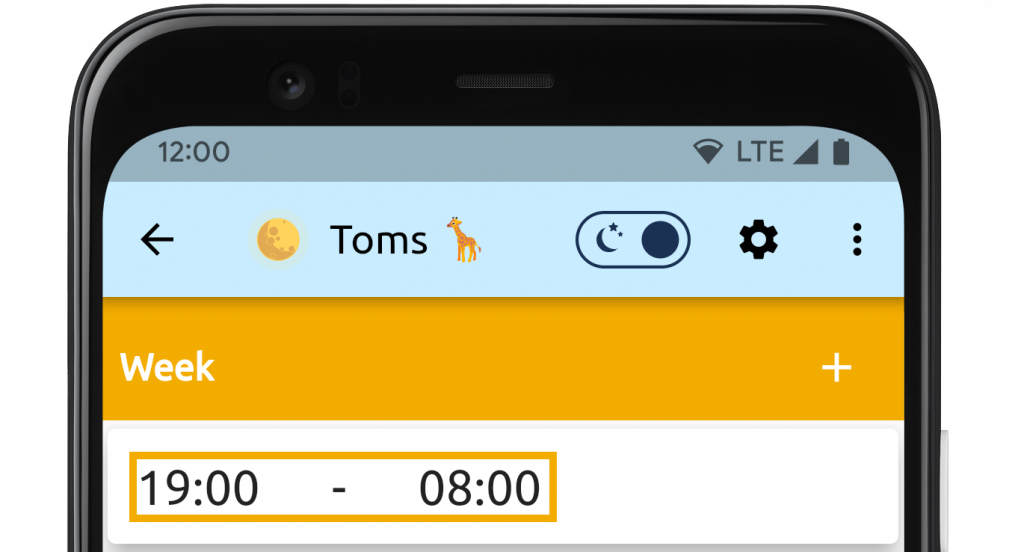
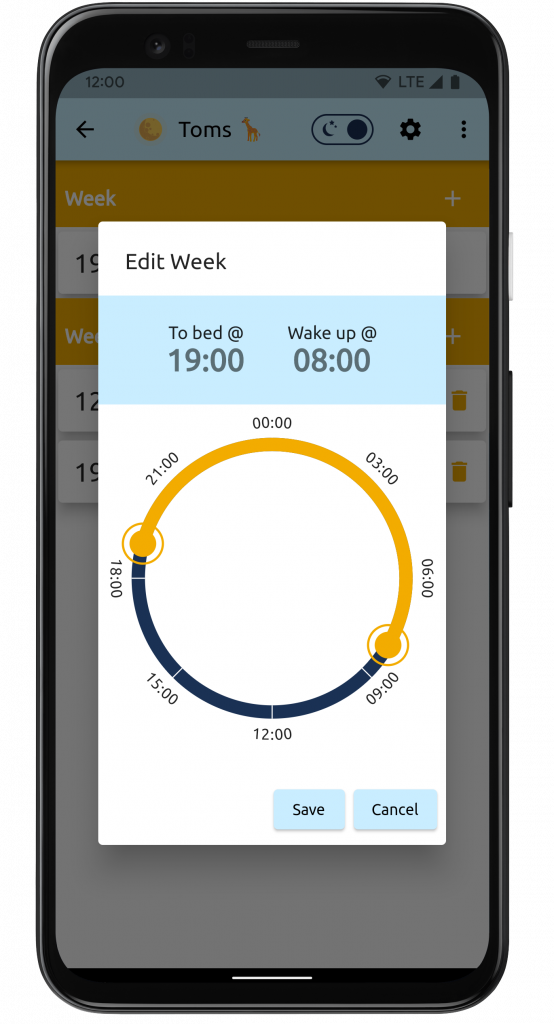
Edit a sleep time
When editing a sleep time all you need to do is click on the specific sleep time line you want to edit and a popup will appear in which you can modify the start time, end time or both for this sleep time.
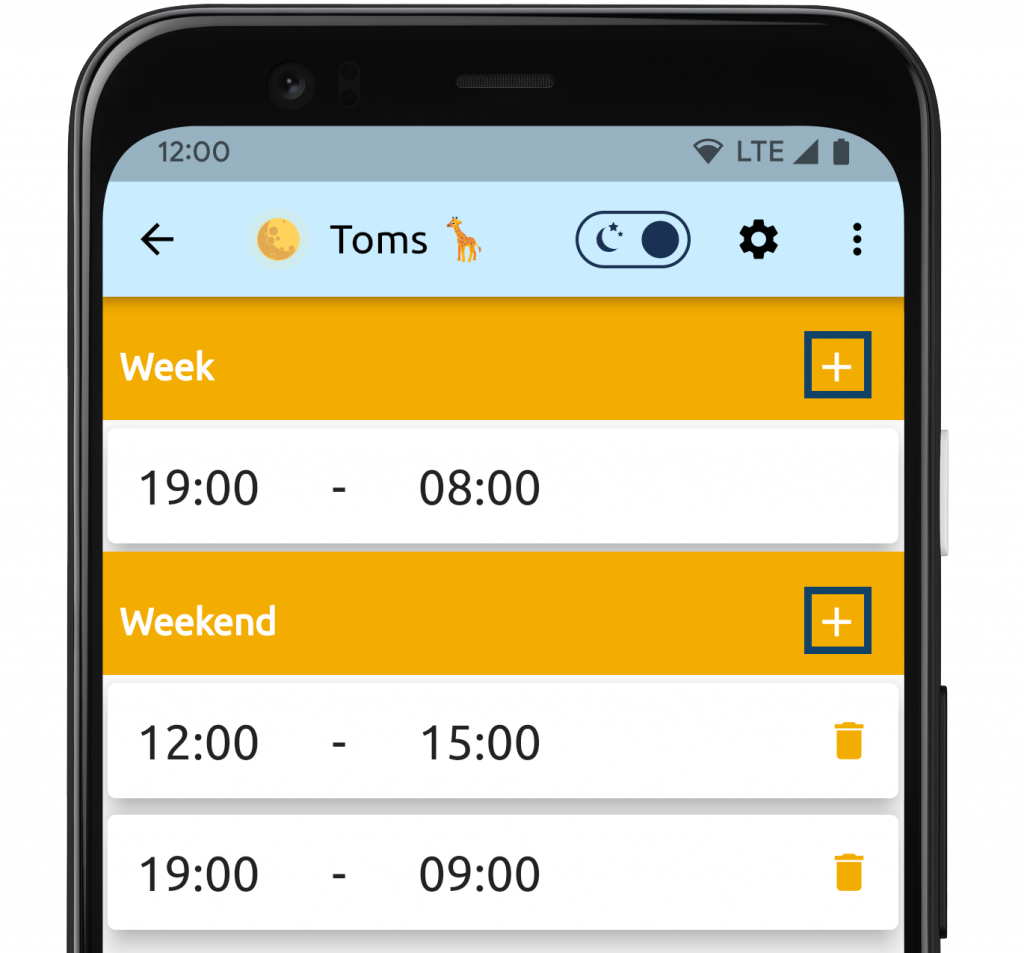
Add a new sleep time
For every day or section you have a ‘plus’ button that you can click to add a new sleep time.
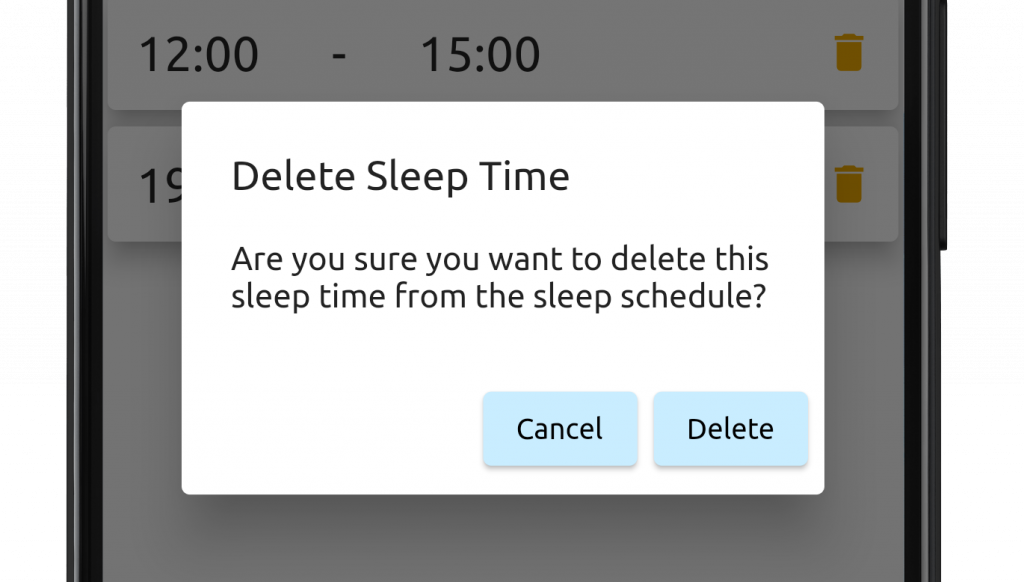
Delete a sleep time
In order to remove a sleep time you can simply press the trash button next to it.
Saving, restoring and sharing sleep times
KiddieAlarm offers you the ability to save a current schedule of a KiddieAlarm for later re-use. Imagine the simple example of a school week versus a holiday period. During the school week you probably want a tight schedule, but in holidays it might be a bit more loose (like going to bed half an hour later). Or during holidays there are no hobbies so the schedule can be much simpler.
With a single press on a button you can restore a previously saved schedule. And what’s even more, if you have multiple KiddieAlarm’s you can restore a schedule from 1 KiddieAlarm to all your others!
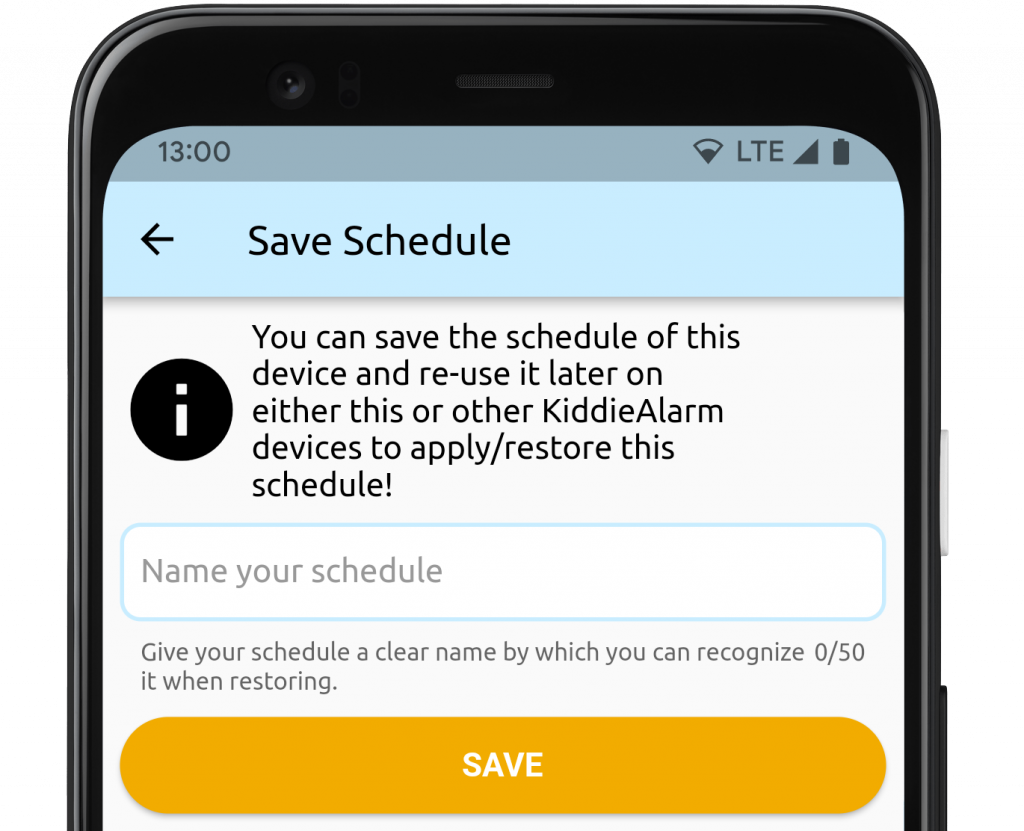
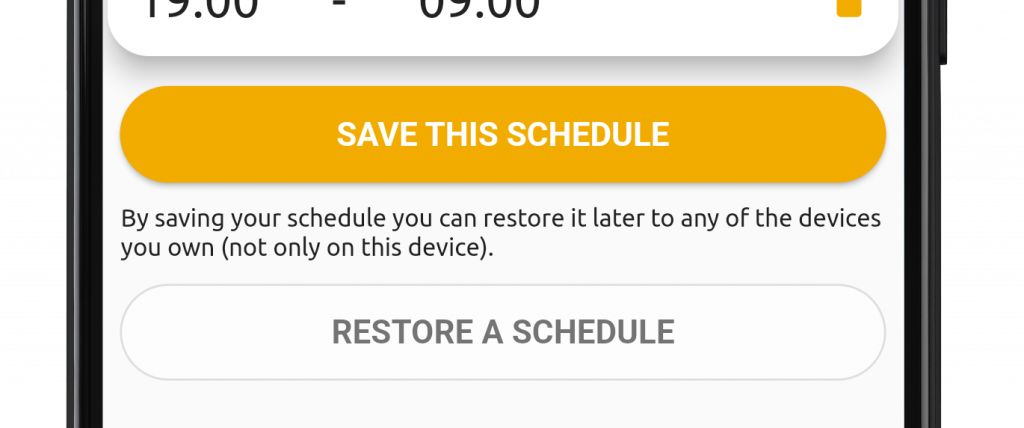
Saving a sleep schedule
At the bottom of your sleep times (you might have to scroll down) you will find the save button.
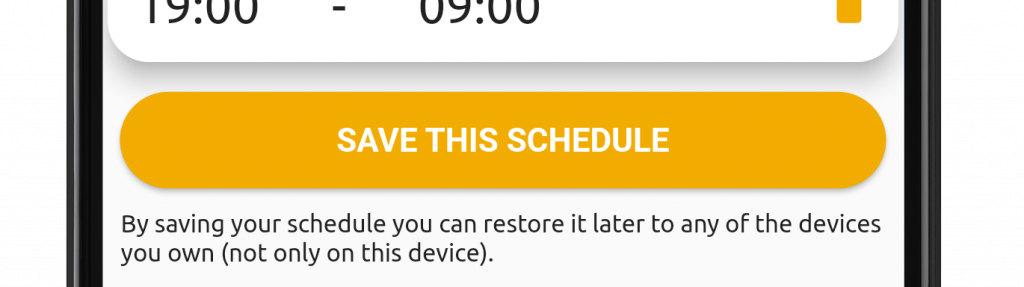
By pressing this button you can give a name to the current schedule.
Restoring a sleep schedule
Just as the save button the restore button is also available at the bottom of the sleep times of a single device.
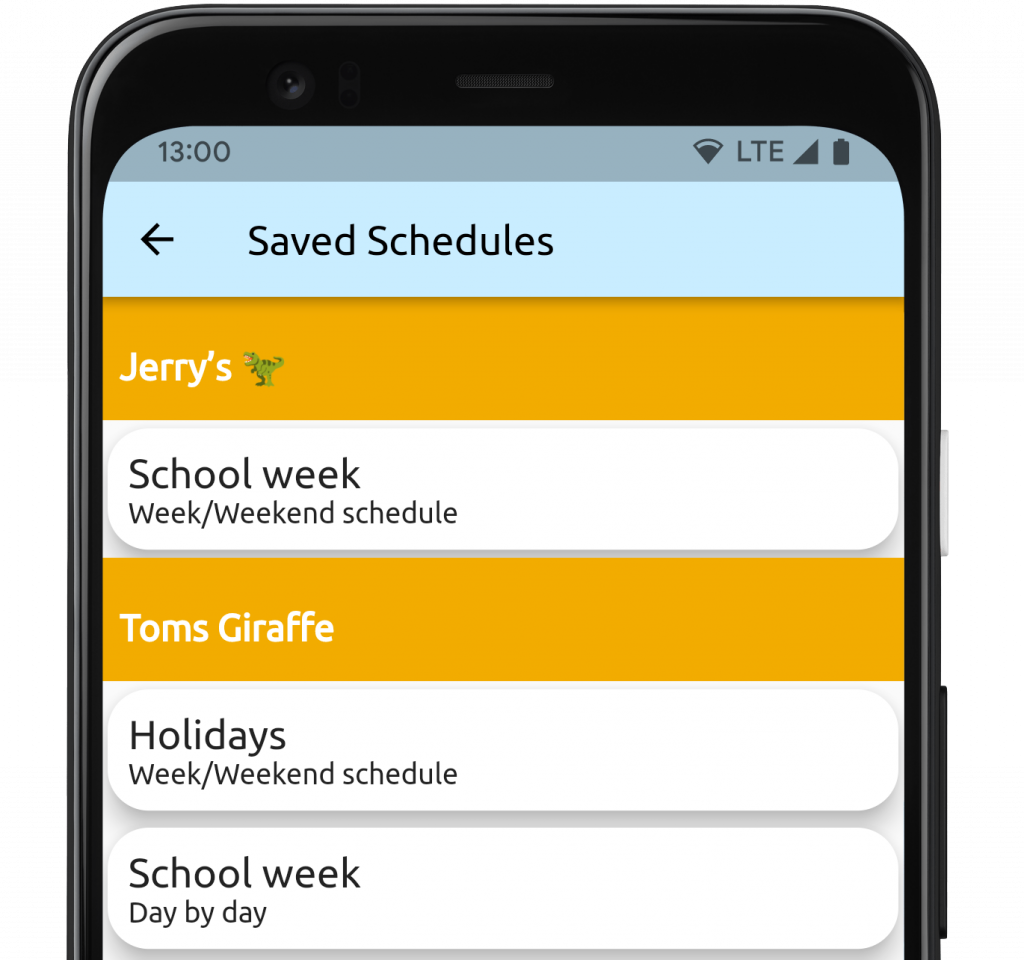
By clicking the restore button you can choose from all the sleep schedules from all your devices! So no need to save each schedule for each device separately!
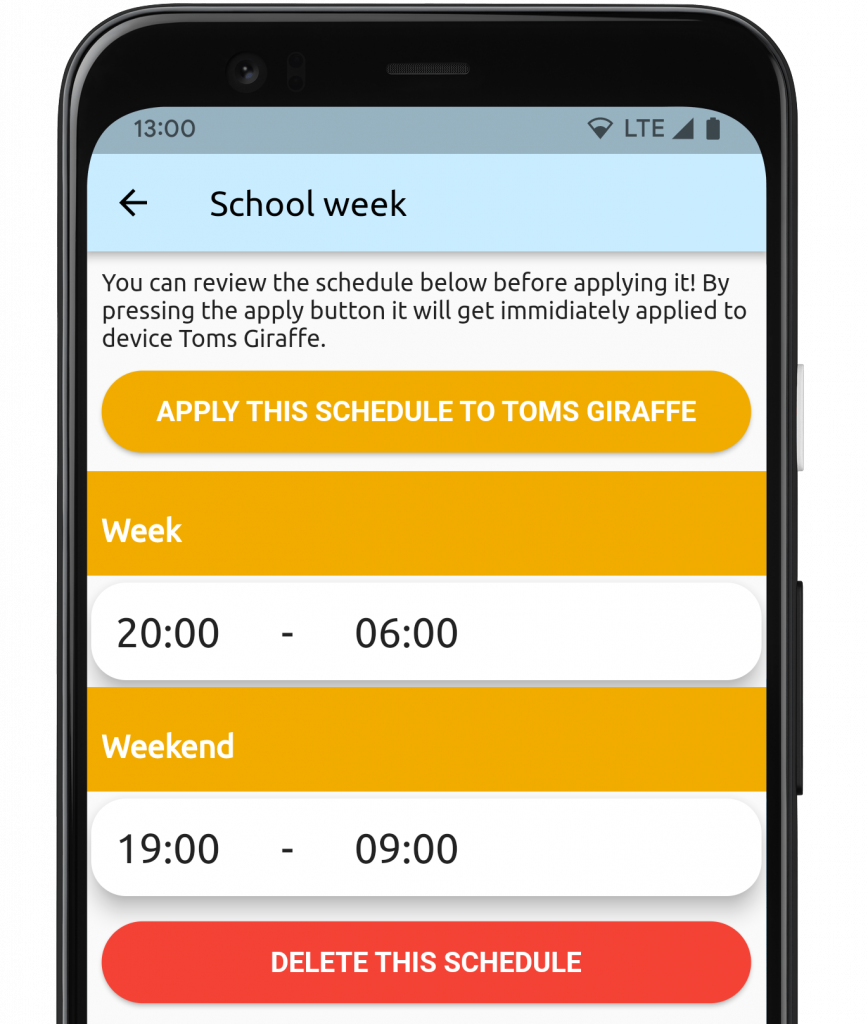
After choosing a schedule you will presented with a preview. From this preview it take you one click to restore the selected schedule.
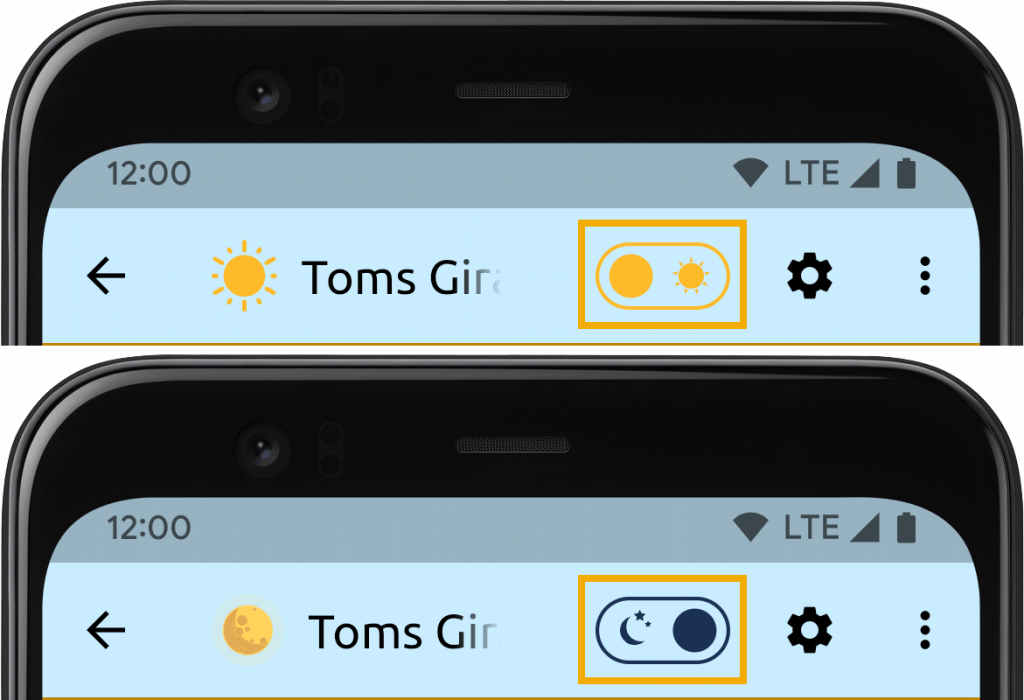
Quickly toggle awake or sleeping (Deviate from the schedule)
From the device detail you can quickly put the KiddieAlarm to sleep or wake him up early if you need to. All you need to do is to press day toggle to switch to night mode, or press the night toggle to switch to day mode. Just a few seconds later the KiddieAlarm will pick up this change!
Power Saving Modes
From the device settings you can configure if and how KiddieAlarm can save on power consumption. KiddieAlarm is already built with low power consumption in mind. However there are some options to save even more on your power consumption.
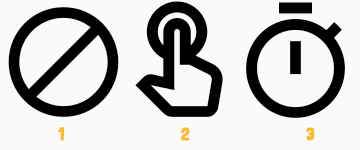
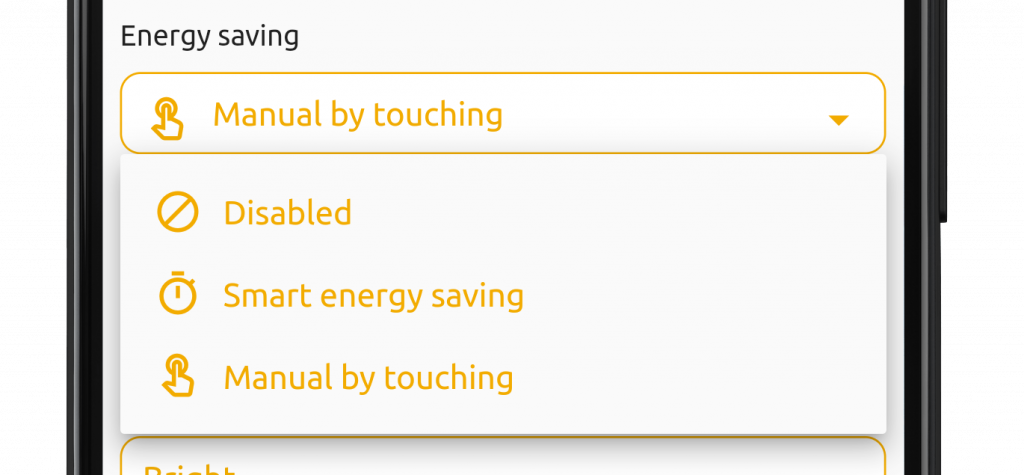
By default extra power saving is disabled. However you can change this to following options:
- Fully disabled, we are still low on power consumption but we won’t do any other effort to save even more power.
- Manually save on energy: With this option enabled you can turn the light of your KiddieAlarm on or off manually whenever you want your KiddieAlarm to be off. This does not make the KiddieAlarm toggle it’s state between awake or sleeping, it simply turns the light off and saves more power.
- Smart energy saving: With this option enabled we save as much power for you as we can when the KiddieAlarm is not in use. We will turn the light of the KiddieAlarm off about an hour after the KiddieAlarm wakes up, about an hour before the KiddieAlarm is configured to go to sleep again, we will turn the light on again. But it’s not only the light! With this option your KiddieAlarm will go in some kind of sleep state where we can reduce its power consumption even more! Note: applying changes to your KiddieAlarm might now take a little longer to be picked up by your KiddieAlarm!
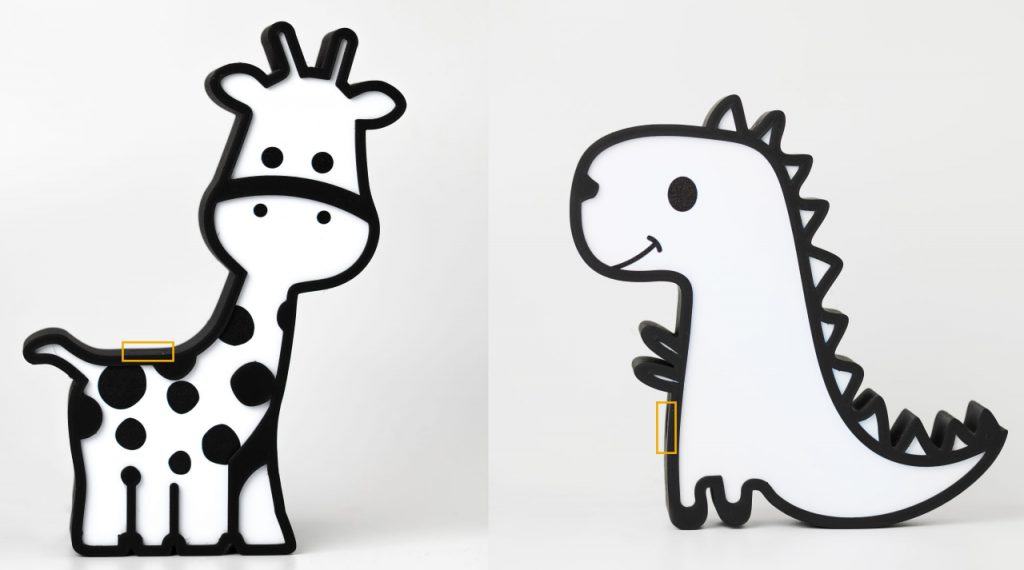
In case of manually energy saving you need to touch your KiddieAlarm in the right spot to toggle lights on or off. See below images on where to touch your KiddieAlarm.
Changing the device settings

From the detail of your device you edit the settings of your KiddieAlarm by tapping the settings wheel. This will let you change all settings from your device.
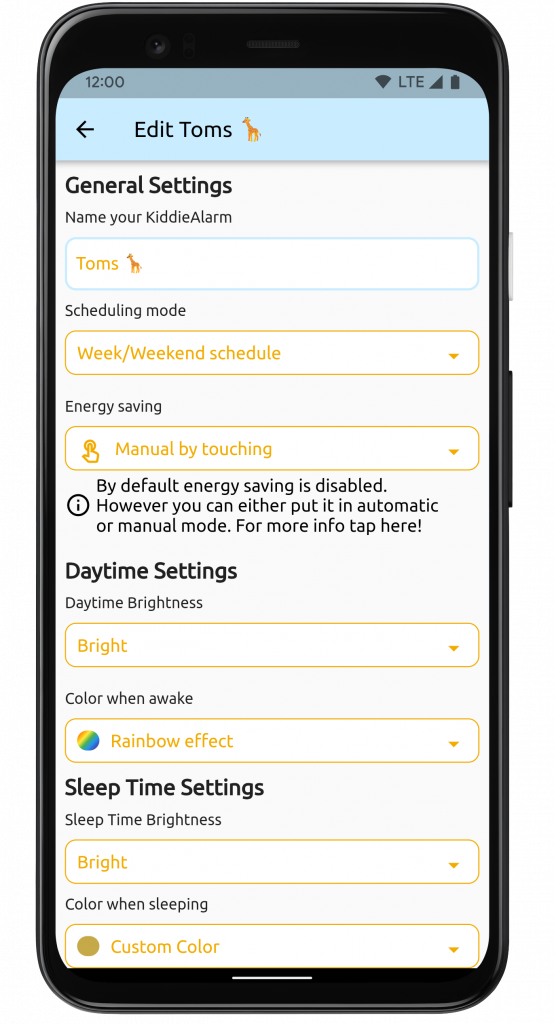
The device settings lets you edit:
- The name of your device
- Your sleep scheduling mode
- The energy saving settings
- Daytime settings (brightness and color)
- Sleep time settings (brightness and color)
Waiting for changes to be picked up
Whenever changing any setting of your KiddieAlarm (time schedules, sleep state, power saving, colors, brightness,…) you will have to give the KiddieAlarm the chance to pick up these changes. The app will inform you if there are pending changes to be picked up by the KiddieAlarm. In case your KiddieAlarm has a good WiFi connection it should pick up the changes in less than 30 seconds. However on poor WiFi networks it can take up to a few minutes sometimes.

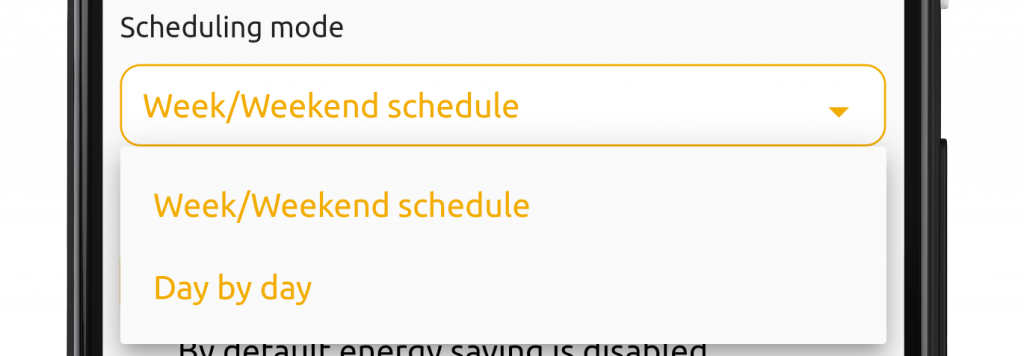
Changing the sleep time scheduling mode
As explained before there are two scheduling modes:
Week and weekend schedule: you simply define the kids sleep times for the week (Sunday evening until Friday morning) and weekend (Friday evening until Sunday morning). For most parents this is all you need since you the kids go to school or daycare during the week while you are at work, and in the weekend they are at home together with you.
Day-by-day schedule: this give you as a a prent a lot of flexibility. If you are working irregular hours or a specific day in the week the family needs to get up earlier then you can set the sleep times for every particular day of the week and weekend.
POWER SAVING MODE
You have the choice out of 3 power saving modes. They are fully explained in the power saving section.
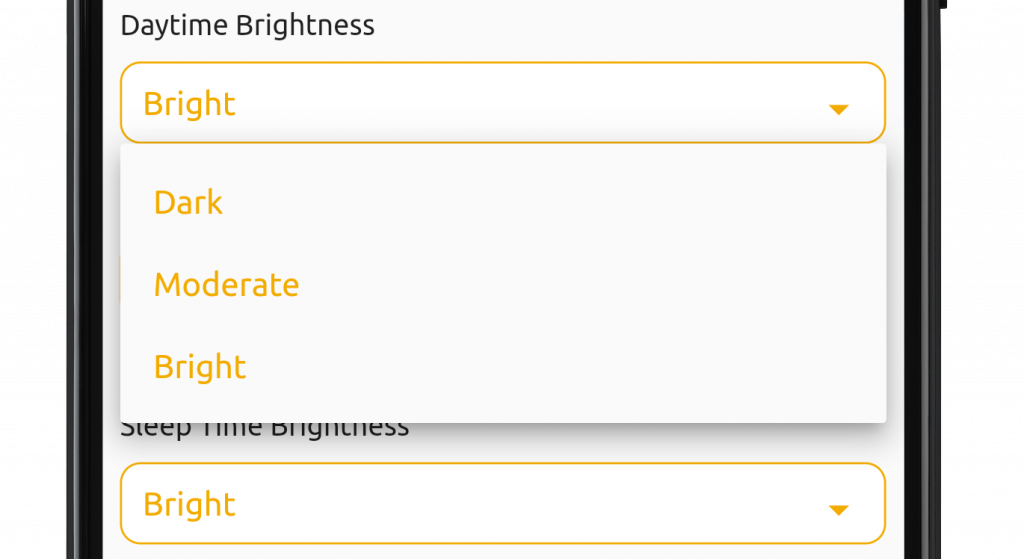
Changing the brightness
Independently from each-other you can modify the brightness during either day or sleep times. Depending on the usage, the distance you put the KiddieAlarm from your kids bed and the size of the room you are going to want to increase or decrease the brightness of the KiddieAlarm.
By default the KiddieAlarm will operatie in the brightest mode, both day and night. Bright mode is ideal for big bedrooms when the KiddieAlarm is put quite far away from the bed. The brightest mode gives you enough light to enter the room of your kid without having to put on the light. This can help for instance when feeding your baby at night so you don’t have to wake him up too much by putting on the regular lighting.
However if it’s too bright you can change it to moderate or even dark.
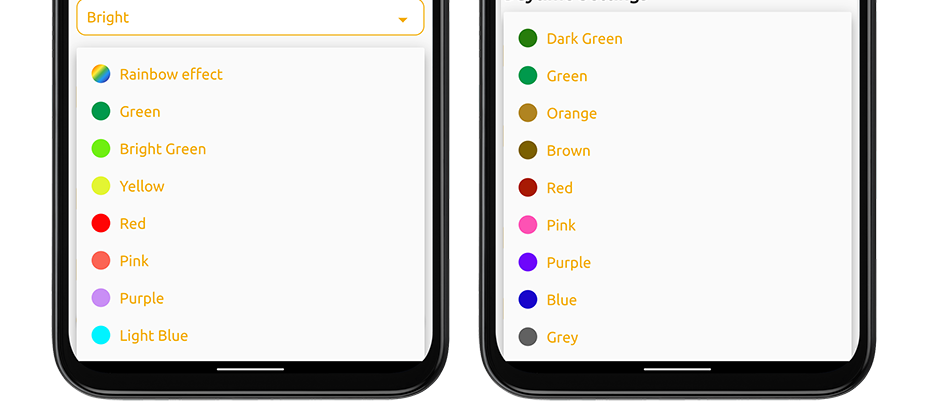
Setting the colors/animations
Also for the colors being displayed by the KiddieAlarm you can set different colors during day and night.
Day colors: During the day we have selected a set of brighter colors which will give your KiddieAlarm the nicest shine. On top of a set of fixed colors there is also our famous rainbow effect (which is the default during the day). This will gently display several colors on the KiddieAlarm and gently move them through the body of your KiddieAlarm so it changes constantly but without making your KiddieAlarm a flashing christmass tree.
Night colors: there is no animation at night. At night we want to set a calm and peaceful atmosphere in the room. That is why we have determined a more darker set of colors for the night.
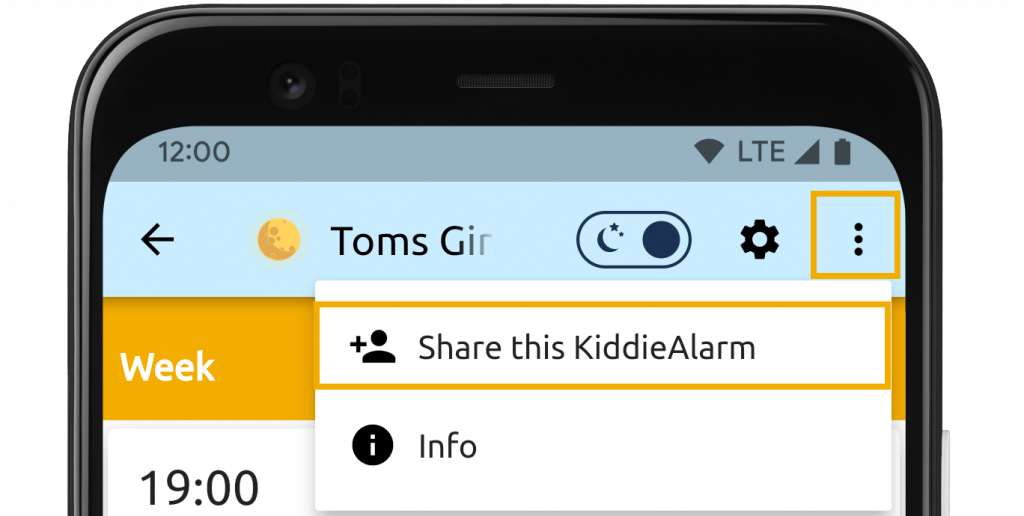
Share with your partner
Sending an invitation
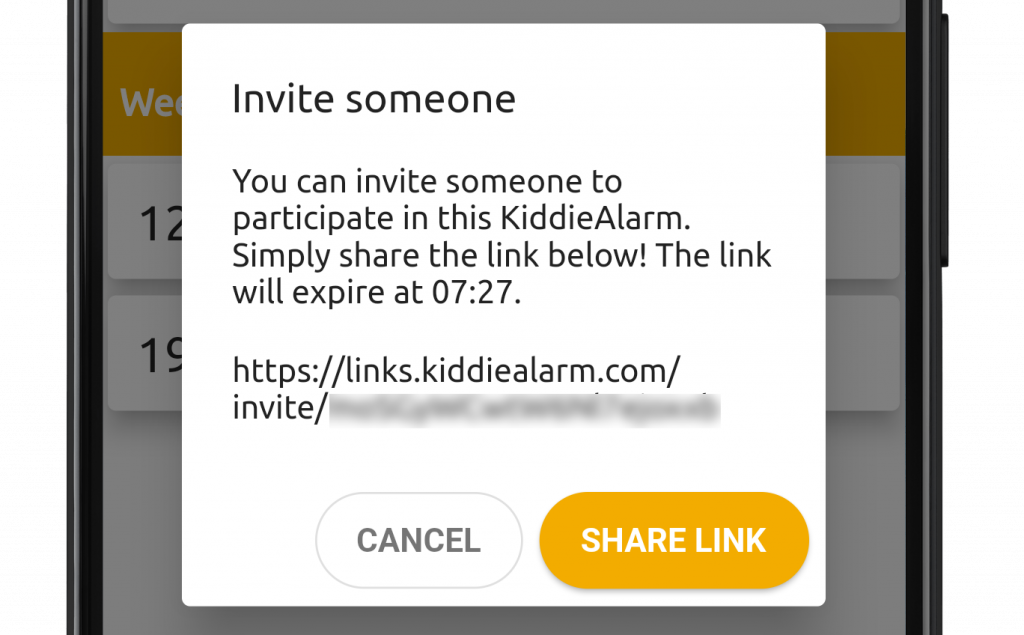
After you have installed your KiddieAlarm it comes in handy to share the device with your partner. This way you partner can also change the sleep times, or if necessary quickly toggle the device to sleep (when going to bed a little earlier) or to awake (when they need to get up a little earlier). And actually sharing is super easy. In the app open the KiddieAlarm you want to share, press the 3 dots on top and select the share option.
Now you are presented with a unique link that you can share with your partner. By clicking the share link you can send the link over email, WhatsApp, Facebook Messenger, a text message or whatever platform or tool you use to communicate with your partner.
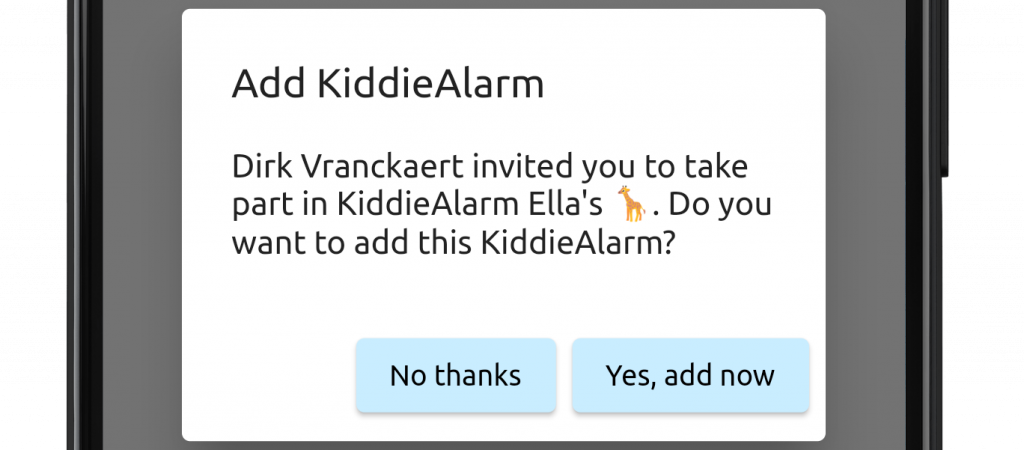
Accepting the invitation
Upon retrieval of an invitation link all you need to do is click the link. Then you need to:
- Download and install the app if you don’t have it yet
- And the app will launch asking you to add the device to your list
Manage access
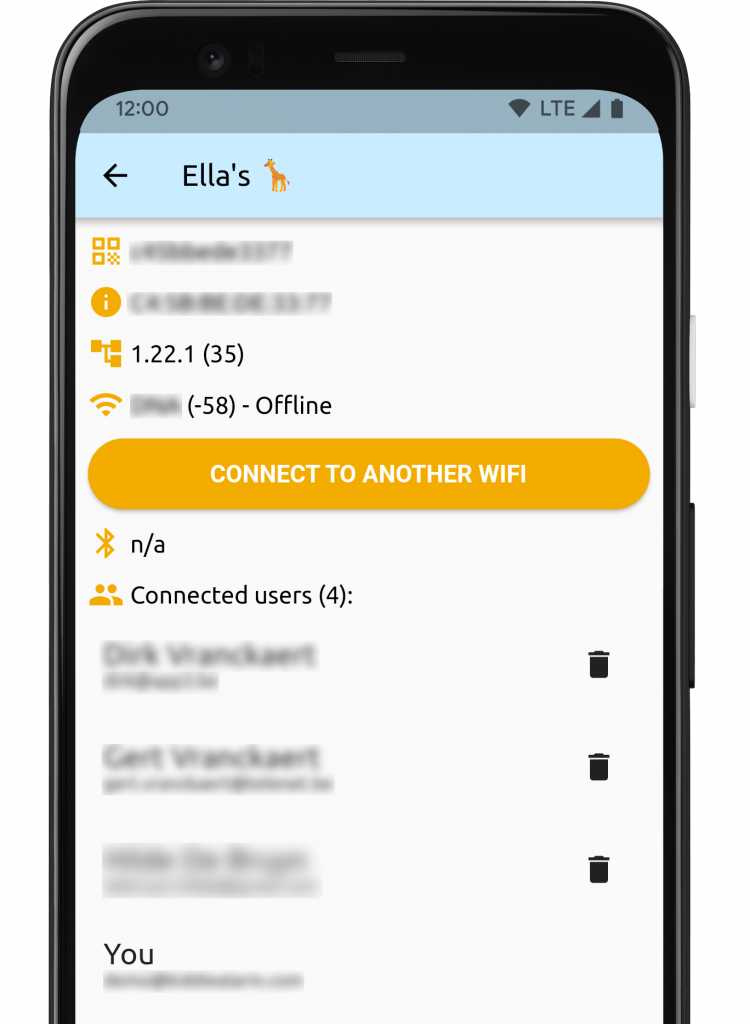
From the device detail you can take a look at some more info about the KiddieAlarm from which you can manage the user accesses.
On the device information you can see everyone who has access to this specific KiddieAlarm and you can revoke the access one-by-one for each connected user. Note: you cannot unlink yourself from a KiddieAlarm!
My KiddieAlarm is Offline, now what?
When your KiddieAlarm is offline it will keep operating as it was connected to your WiFi network. However when operating without WiFi for too long the device time might become accurate. You will however still be able to adapt the settings of your KiddieAlarm as long as you are close enough to it.
There could be several reasons your KiddieAlarm is offline. Some possibilities for an offline KiddieAlarm are:
- Your KiddieAlarm has poor WiFi reception in the place where you installed it
- Your WiFi network is down or troubled
- You moved the KiddieAlarm to a different location/house and need it to connect to a different WiFi network (or you took it on holidays).

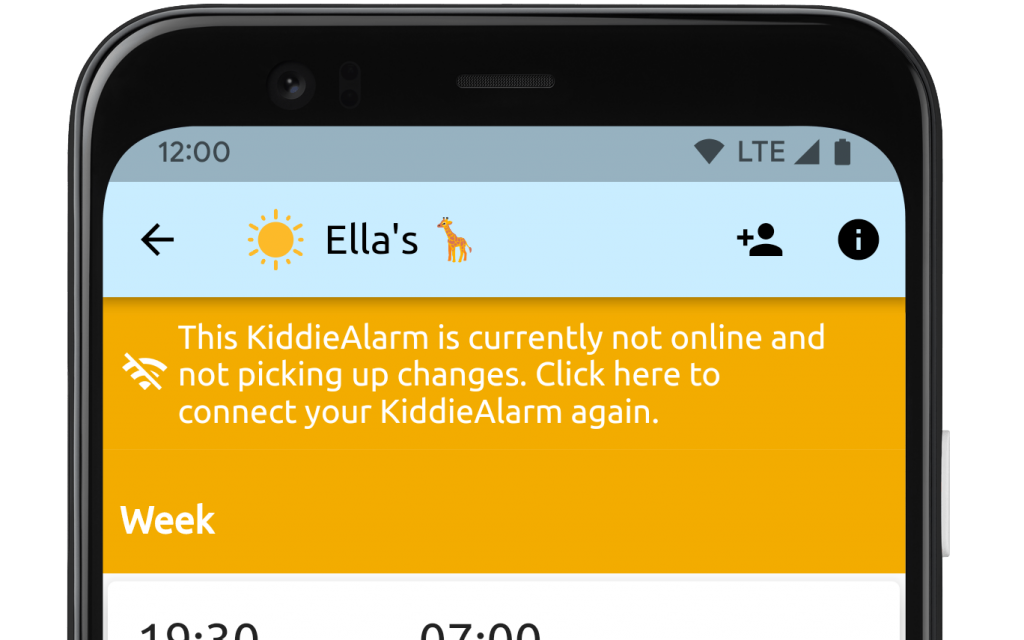
If you see this message in the app you know your KiddieAlarm is offline! You can simply reconnect to it by tapping the message. Make sure you are close enough to your KiddieAlarm (the top message will indicate your connectivity) or get to closer it until the app can detect it.
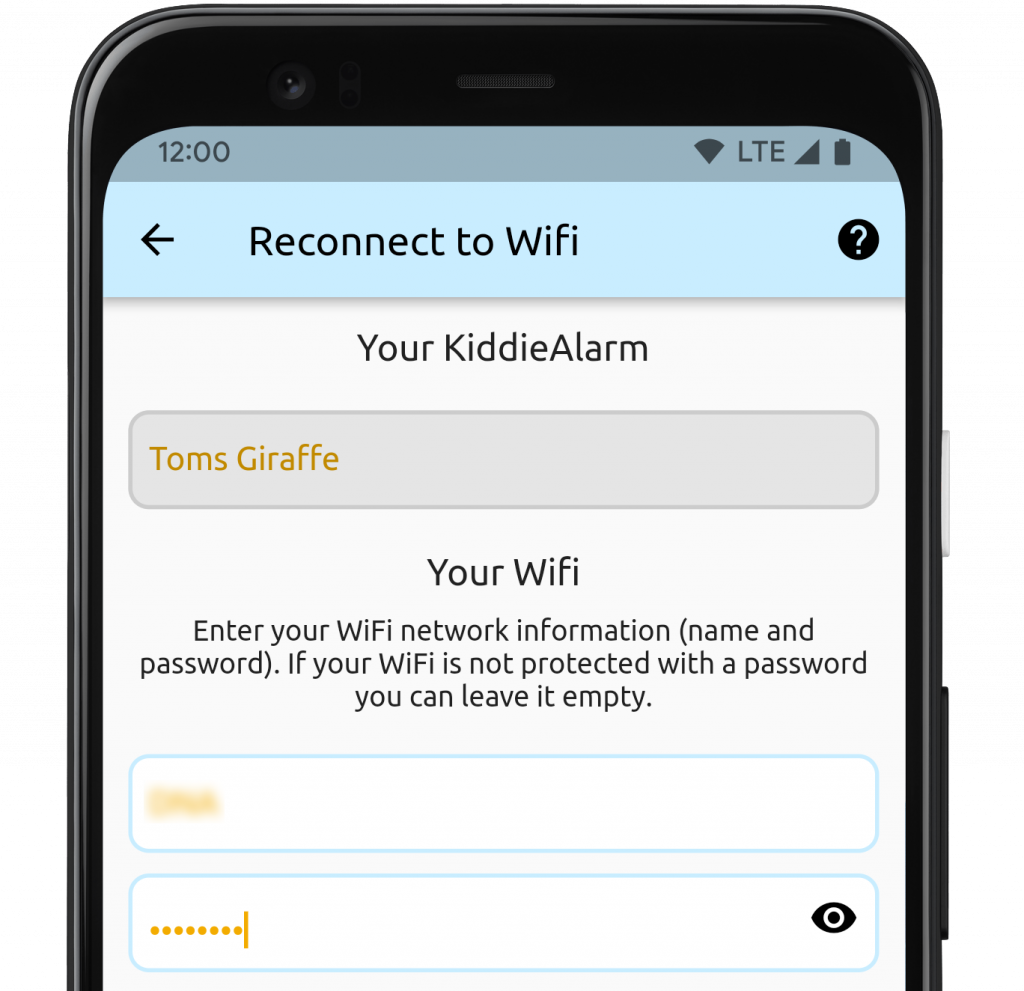
Now stay close to it and enter your new Wifi information in order to let the KiddieAlarm connect to it and get back online. If you are connecting it to a public network without password, simply leave the password field empty.
Take your KiddiEAlarm on holidays
You can take your KiddieAlarm with you on a holiday, no problem. But before you leave, make sure to check the app and verify that both your app and KiddieAlarm have the latest version!
There are actually two ways you can use your KiddieAlarm on your holidays:
- Online, connected to a WiFi network (this is the preferred way if possible)
- Offline, then you need to make changes to the settings
WiFi Available (Online mode)
If WiFi is available at your holiday location you can simply power it on and configure it. However not all WiFi networks are suitable! You will need a regular WiFi network (with or without a password). Lots of hotel WiFi networks do come with an extra authentication (like your room number or reservation name etc), these will not work. In this case you have to use the offline mode!
A valid WiFi network can be:
- a local provided wifi in the building you are staying, if you connect to it from your phone you should not have to do any additional authentication steps, otherwise you will have to use offline mode!
- a hotspot created with another smartphone, tablet or hotspot device
Your KiddieAlarm needs a wifi network on startup because it needs to get the current time and load your latest settings (sleep times, color setup,…). Please setup the device in the correct place/room where you finally want to use it.
If you unplug your KiddieAlarm and take it with you on your holiday the app will tell you that it is offline. As soon as you arrive on your destination you can simply set it up again. Plug it in the wall outlet, make sure you are in reach of the WiFi network (and your phone is connected to it) and simply press the message from within the app and follow instructions.
Setup a hotspot from your phone (Android and iPhone)
Before continuing with using the KiddieAlarm in full offline mode, which is possible but always a bit more tricky, you better have a look at setting up a hotspot with your mobile phone in order to let the KiddieAlarm connect to it and make your changes. The KiddieAlarm does not need to remain connected for the entire period of your holidays though, only the time while you configure it and until it has picked up all changes is needed. Afterwards you can disable your hotspot again and the KiddieAlarm will continue to operatie as normal.
However setting up a hotspot to which you can connect your KiddieAlarm is different on Android phones and iPhone’s.
Setting up a hotspot on your iPhone
The default hotspot you can configure on an iPhone is not compatible with the KiddieAlarm. To make it compatible however you need to enable the options “Allow Other to Join” and “Maximize Compatibility”. Doing this enables the hotspot to be findable by KiddieAlarm devices.
After having enabled both options you should use the name of the network (something like “YourName_iphone_model”), listed at the bottom of the hotspot configuration screen on your iPhone, and the password, which you have set up yourself on your iPhone, in the WiFi reconnection screen of KiddieAlarm.
Setting up a hotspot on your Android phone
In theory most Android phone hotspots are out-of-the box compatible with KiddieAlarm. However you need to make sure that you have enabled the option “Extend compatibility” from the hotspot settings. We also recommend to not use any uppercase and lowercase mixing in the name of the hotspot as well as to avoid special characters and numbers.
After having enabled the hotspot you can enter the name of the hotspot (as you have configured it in your Android phone settings) and the password of the hotspot (which you also have configured in your phone settings) in the WiFi reconnection screen of KiddieAlarm.
No WiFi available (Offline mode)
Once plugged in your device to a power outlet, make sure it’s immediately in the right spot where you want to use it! It’s not advised to plug it out of the power outlet all the time since that will let the time of the device deviate and the device won’t be operating correctly anymore!
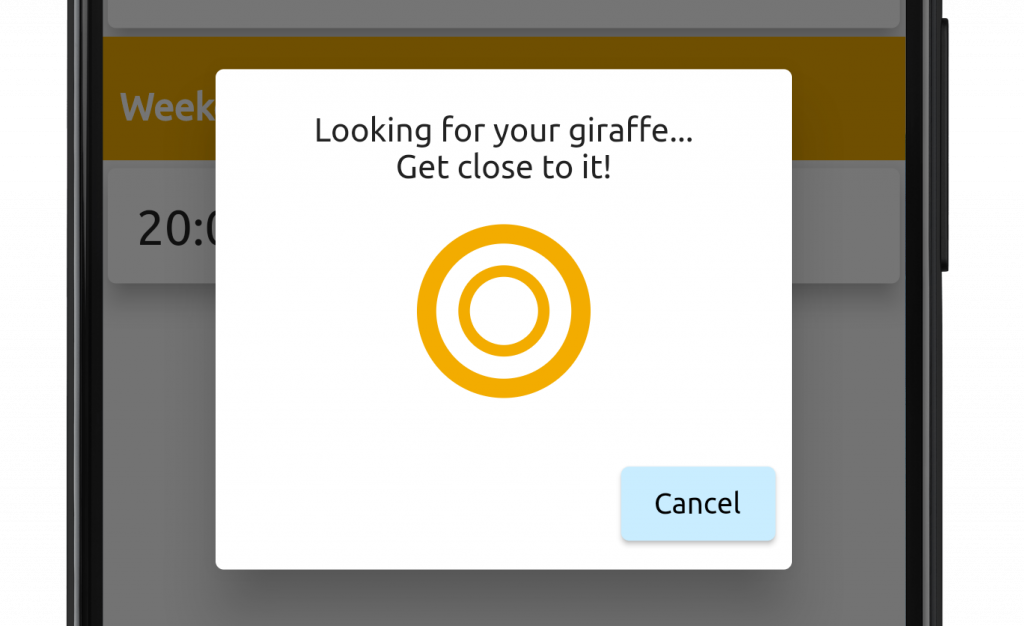
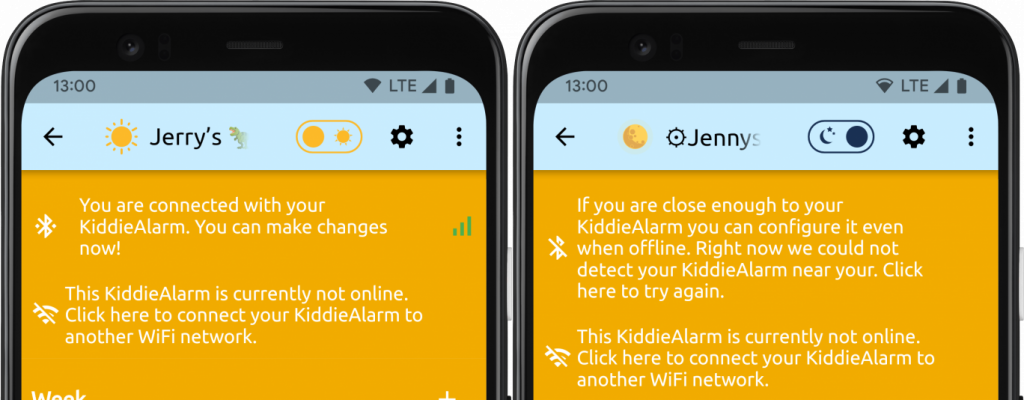
Once the device is installed you should at least once open your KiddieAlarm and select the device you are installing on the holiday location. You will see either one of both messages. The left one indicates you are close enough to the KiddieAlarm to make changes to it. The right one indicates that you need to get closer to it. If you are close to your KiddieAlarm just tap the message and it will look for your KiddieAlarm again.
In case you keep seeing the message that you need to get closer, you should fully close the app on your iPhone or Android phone and open it again.
From now on you can start controlling your KiddieAlarm in offline mode. Every change you make will be send to it if you see the connected message on top. Otherwise the app will tell you that you have pending changes that are not picked up if you don’t go close enough to your KiddieAlarm.

In theory the KiddieAlarm can be controlled over a distance of more than 10 meters. But we advice for proper working of the KiddieAlarm to only do so within a short range (up to 5 meters) with the signal indicator green or yellow.
Going Back Home
When coming home from your holiday you can simply install the KiddieAlarm again at your kids room. In case you had it connected to the holiday WiFi or your smartphones hotspot you will see the offline message again. Simply tap the message and follow the instructions on screen to reconnect your KiddieAlarm to your home WiFi network. If you used it fully offline on your holiday location it will automatically reconnect to your home WFi network!
Device Information
From your device you can access the device information using the info option (5)
The device information screen shows you some technical information such as your device serial number, WiFi connectivity and the users that are connected to this device.
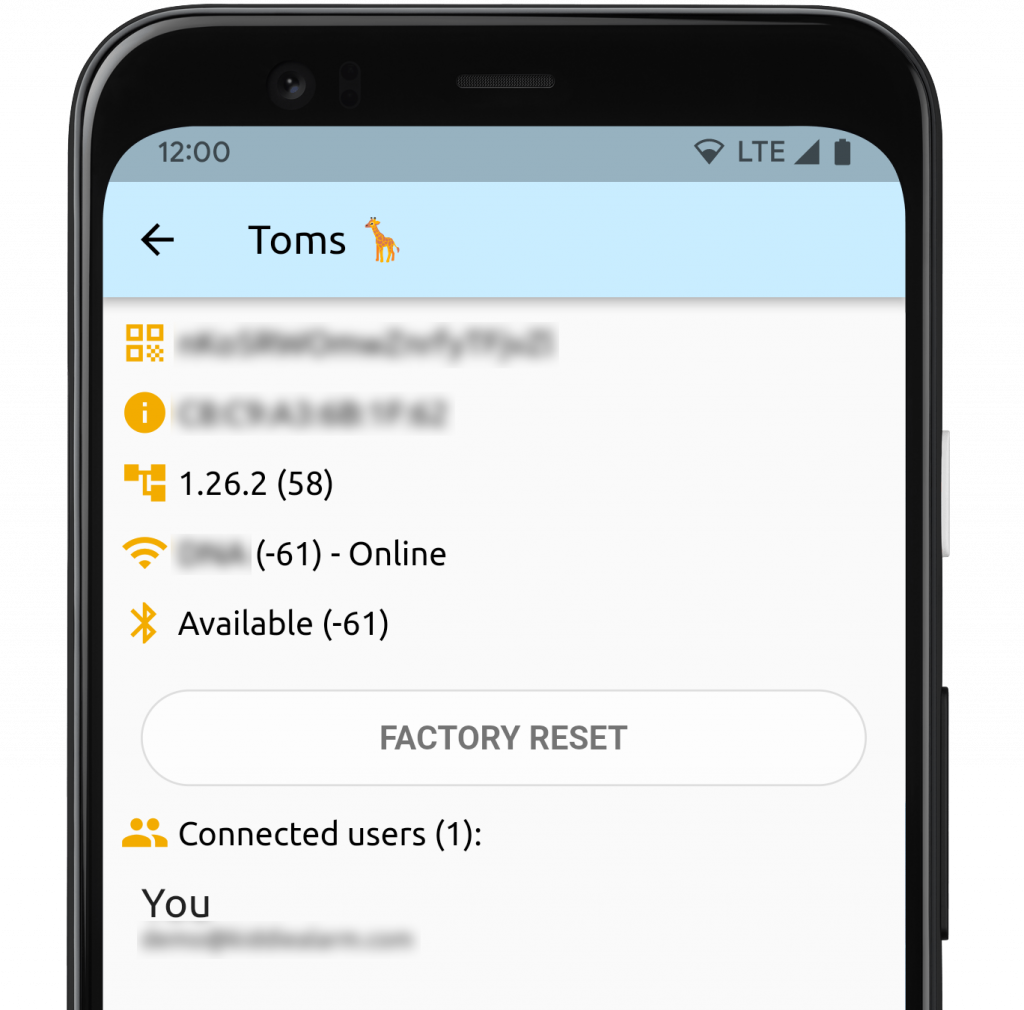
Factory Reset
From this device information screen you can perform a factory reset. This will:
- Remove all users from the device
- Reset the name of the device
- Reset all color, brightness and power saving settings of the device
- Reset the device to setup lode (flashing blue)
Caution: there is no way back after confirming a factory reset!
